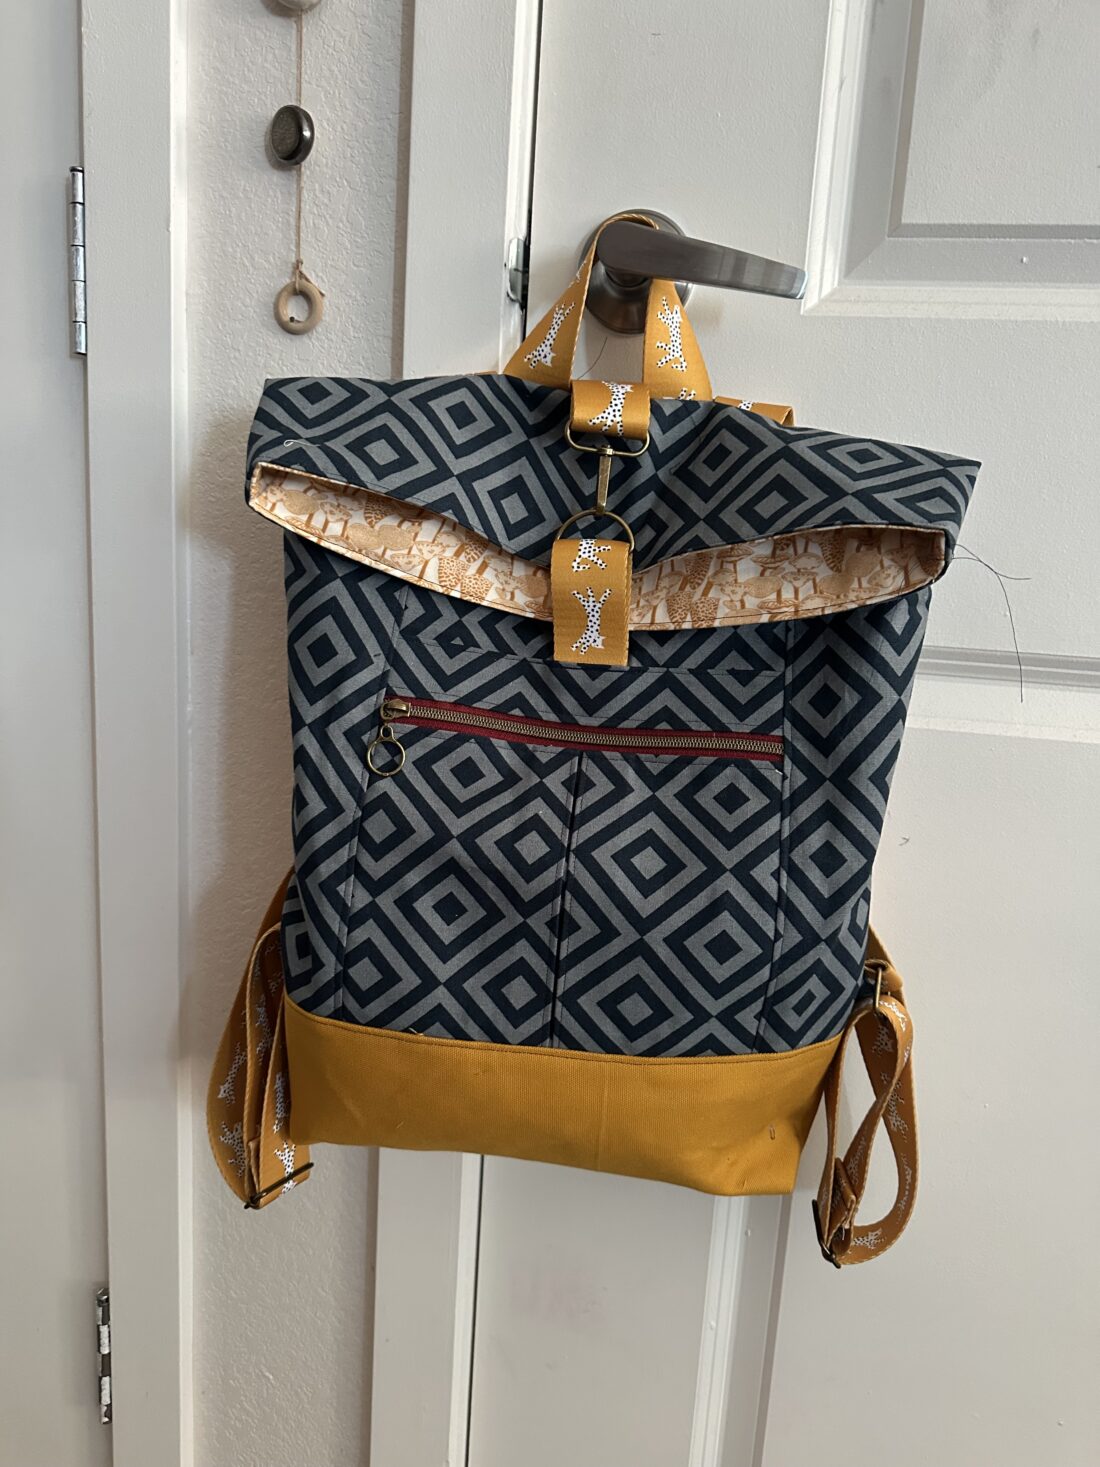
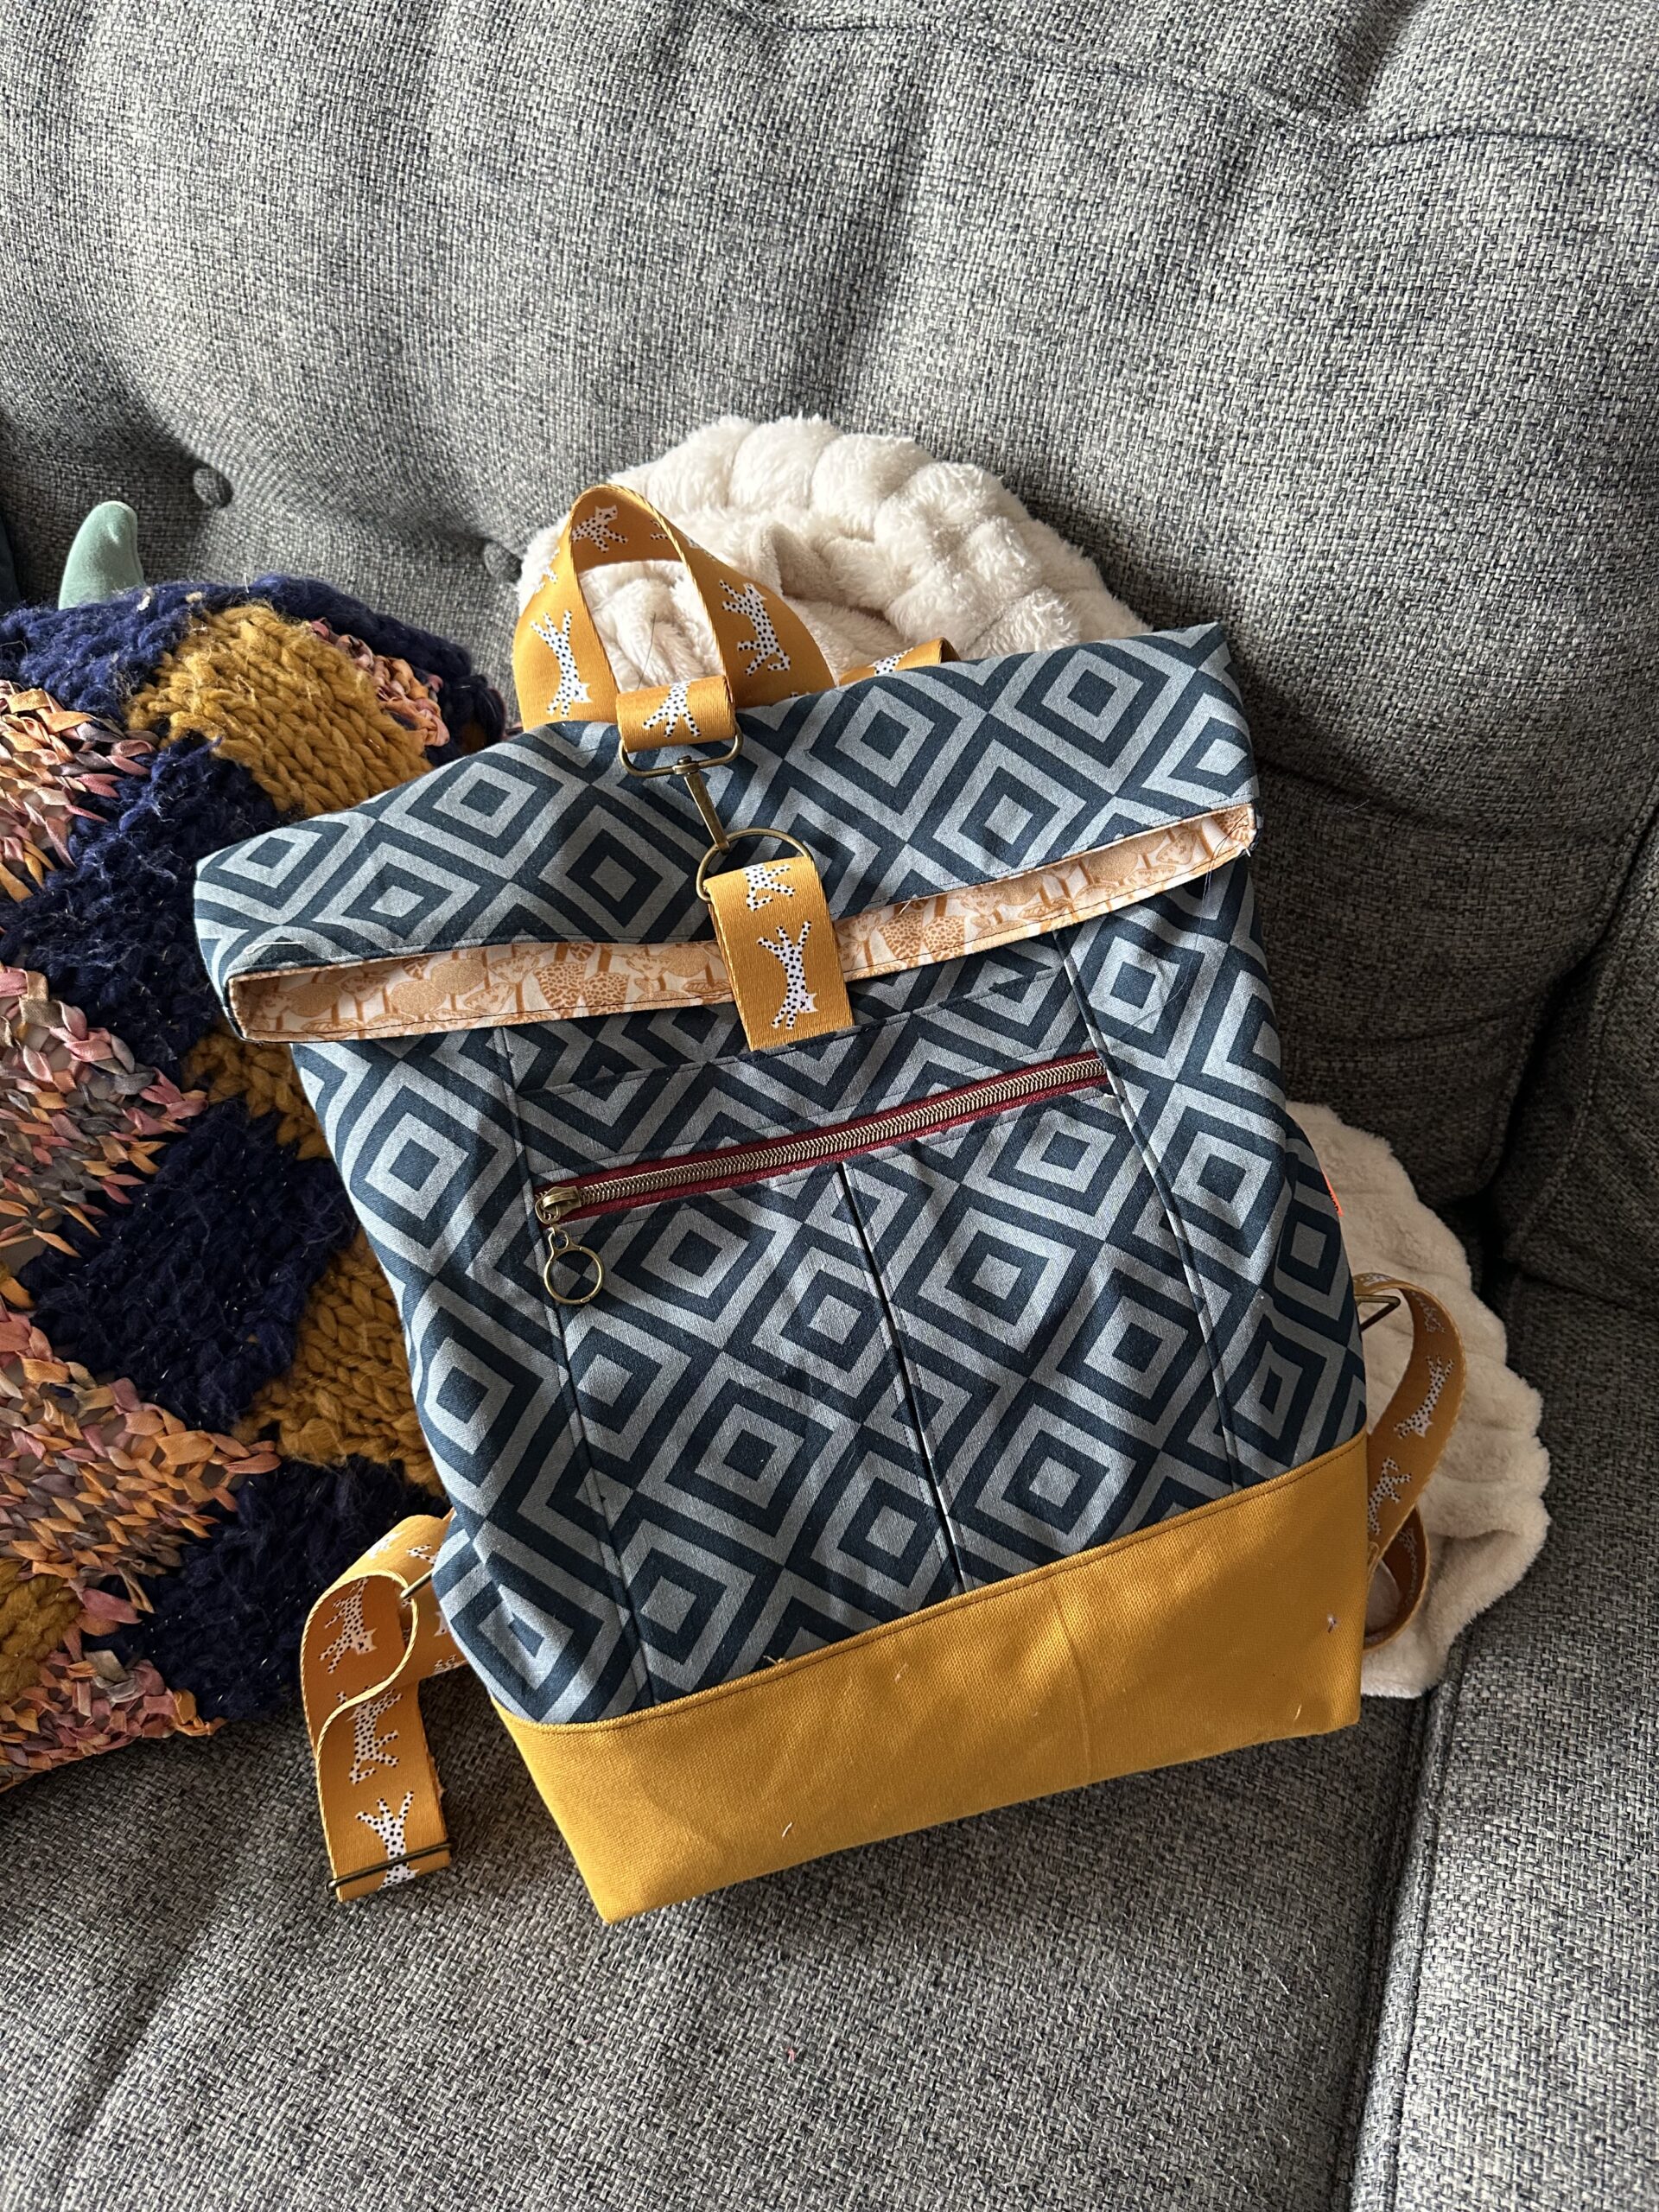
I was dabbling around in a sewing store, putting random combinations together for bag inspiration, when I found myself drawn to this mustard and navy combo. I quickly realized I wanted to make something to show off this fun snow leopard webbing and, from there, the concept for my Range backpack was born.
When I first started sewing, I quickly rushed through three beginner classes so I could have the skills necessary to take a bag class. The first bag I made was also a Noodlehead pattern (the Haralson Bag), and I definitely made a few mistakes along the way.
This Range backpack would have been a great first bag project. The construction and pattern pieces are simple and the bag itself is big enough to prevent the annoyances of sewing with really small, thick, and precise bag pieces. If you’ve tackled a few “beginner” projects, I think you are more than well-equipped to handle the Range Backpack.
Pattern Overview:
Designer: Noodlehead (Anna Graham)
Pattern: Range Backpack
PDF Price: $10 USD
Type: Backpack
Skill Level: Intermediate (While this pattern is technically for the intermediate sewer, I think an advanced beginner could tackle this one. I also think it would be a great bag pattern for those who want to make something a little more advanced than a simple tote, but not as advanced as some other bags out there.)
Materials and Modifications:
Body: Rainier Mochi Linen by Moda in Blue Diamonds (70/30 cotton/linen)
Lining: 100% Cotton, Cotton + Steele Mushroom Love – Fall Enchantment – Mustard
Accent: Big Sur 9.6 oz Canvas by Robert Kaufman in Mustard
Webbing: Ruby Star Society Snow Leopards 1.5″ Webbing
Notions: zipper by-the-yard, zipper pull, thread, brass 1.5″ hardware (swivel clasp, 2 rectangle rings, d-ring, 2 strap slides), medium-weight interfacing, light-weight interfacing
I sourced everything from my local fabric store, SewBo, in Boulder, CO. While they are out of stock of most of these fabrics, they can be found online from a few stores still!
Construction:
After I set aside the time to cut all the pattern pieces, this backpack came together quite quickly. Surprisingly, I didn’t really do any pattern matching and my backpack magically came together in a way that the pattern flowed nicely. Call it witchcraft if you must.
In one place, I did run out of medium-weight interfacing and used two layers of light-weight interfacing instead. So far, this hasn’t really affected the bag.
My Modifications:
I didn’t make any huge changes to my pattern, but I did swap out webbing in place of the top loop, bottom loop, and straps. This meant a few changes to the hardware, but that was easy-peasy.
I used a 1.5″ D-ring and swivel hook for the closure (instead of the double d-ring closure the pattern called for) and I was pretty happy with this substitution. It makes it much easier for me to open and close.
My Thoughts:
I love this backpack and now take it everywhere. It’s not quite my day-to-day work bag, but it probably could be if I wanted. I usually keep a few things in here for when I’m running out of the house for the day but don’t need a laptop with me. I’m a bit picky, but I like having a laptop sleeve in my work backpack for this reason.
The best part of this bag for me is definitely the pattern and the colors, which is usually the most fun part of making any sewing pattern yourself.
What do you think? Is the Range backpack on your sewing list?